Welcome back.
In the last post, I discussed two variants of medieval glue, one being derived from rawhide and the other from cheese. As I mentioned, the cheese glue is a crucial piece in forming the wooden part of the Black Prince’s shield, which is what this post will be about. I will also be broadly going into the evolution, size, and shape of heater shields.
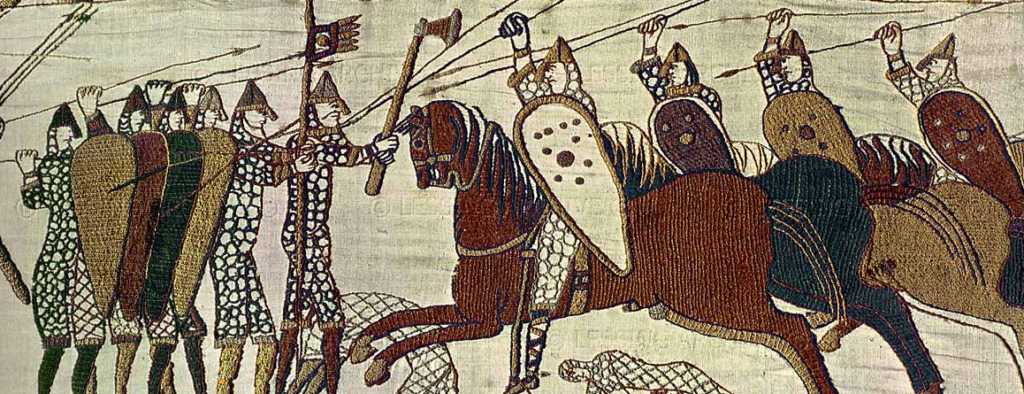
So first, where do Heater shields come from? The simple answer to this is that they are the direct evolution of the Norman Kite shield. If you look at the shape of the kite shield this becomes readily apparent; the heater shield is essentially a smaller version. The kite shield was very popular throughout the eleventh and twelfth centuries in Normandy and Britain (although it originated in the Byzantine area). Kite shields had a concave shape and tapered towards the bottom which gave a few distinct advantages. The curved shape makes blows glance or slip off the shield easily and gives more optimal coverage of the body. While the tapered bottom did expose the legs more it also made the shield much more useful when on horseback. The taper also made the shield more light-weight and maneuverable in exchange for less leg protection, but who needs legs anyway? Seriously though, legs are typically a bad target in melee combat for many reasons.
So, if Kite shields are so spectacular, why did thirteenth-century knights start mingling with the heater shield? The main reason for the transfer to heater shields was the advancement in armor. Typically, as armor improved, shields shrunk. The more protection you wear, the less you need to hold. Smaller shields, heater shields included, are lighter to carry, quicker to maneuver, and more convenient for cavalry. Giving up the protection a bigger shield provides was now viable because of better armor. Further proof of this phenomenon is that by the end of the fourteenth century and into the fifteenth, heater shields began to lose popularity. They started to be used mostly if not almost exclusively in jousting, and bucklers began to take their place as the more standard shield to carry around.
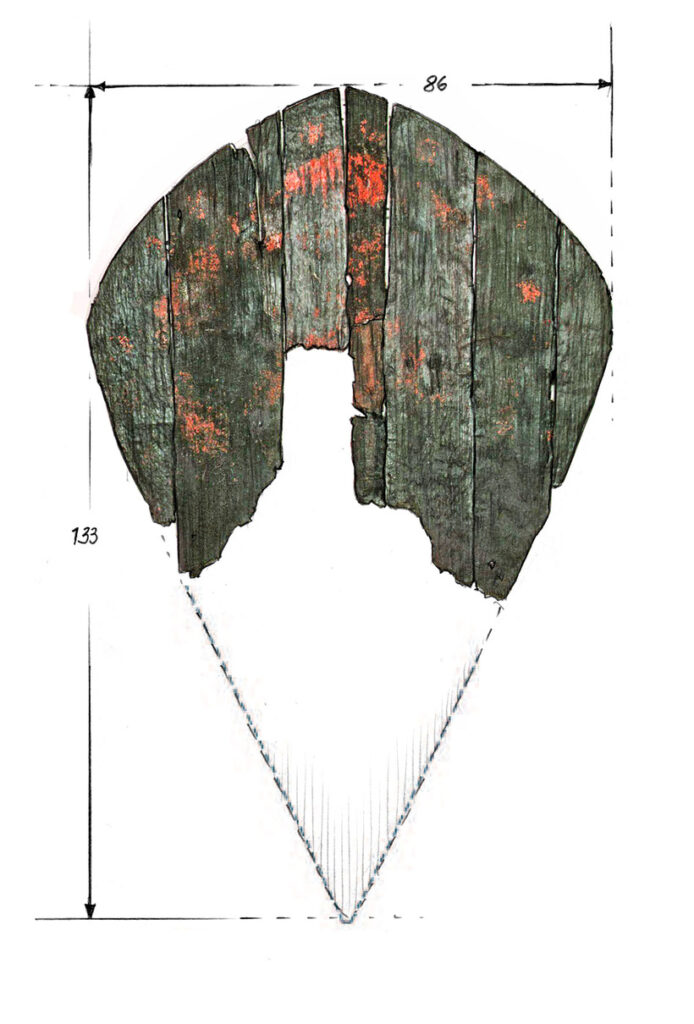
So, onto the shaping of the Black Prince shield; first step is curving the wood. Having a concave shape is an integral element in any heater shield, and the archaeological reports on the Black Prince shield mention it has a slightly curved shape (this can also be seen in the pictures). To my knowledge, there seems to have been two ways medieval craftsmen could have gone about this process, curved panel veneering or glued butt joints (seriously, that’s what it called).
Here is a Kite shield from twelfth century Poland; it is clearly visible that the boards were butted together, and most likely glued. If each board is cut/glued at a small angle it would yield a curved shield. After the shield is sanded, covered in canvas, and painted these joints would have been impossible to notice.
The other method is curved veneering, which is the method I’ll be attempting. This process is normally quite simple to accomplish. If you stack together two or more thin pieces of wood, you can bend them with clamps, tension, weights, or any other creative method. If the layers of wood are glued together while curved, they’ll retain the bowed shape when the glue dries. The Black Prince shield is made from two pieces of poplar wood and judging by pictures, the shield had to of been assembled with this method.
So, for my Black Prince shield, I will be using two sheets of 100% poplar plywood (2ft x 4ft x 1/4in). I will also be using the cheese glue I made in last week’s post (which you can read here) to stick these two boards together. Also, curved veneering does put a lot of stress on the glue, so I fully expect this first attempt to fail.
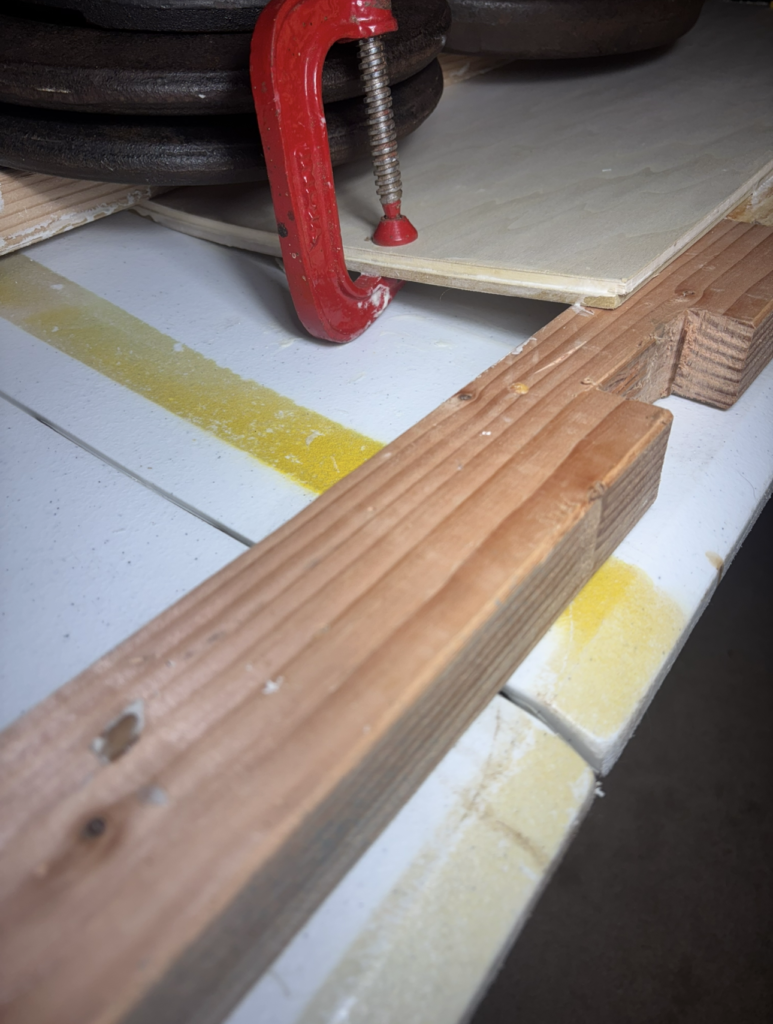
I’ve put the first board down with the edges propped up on some 2x4s;this gives a recess under the board so I can stack weights on top to accomplish the curve. I then covered the board with an excessive amount of cheese glue. Now that it’s on the board it looks much chunkier than I expected and has made me lose all faith in the integrity of the glue.
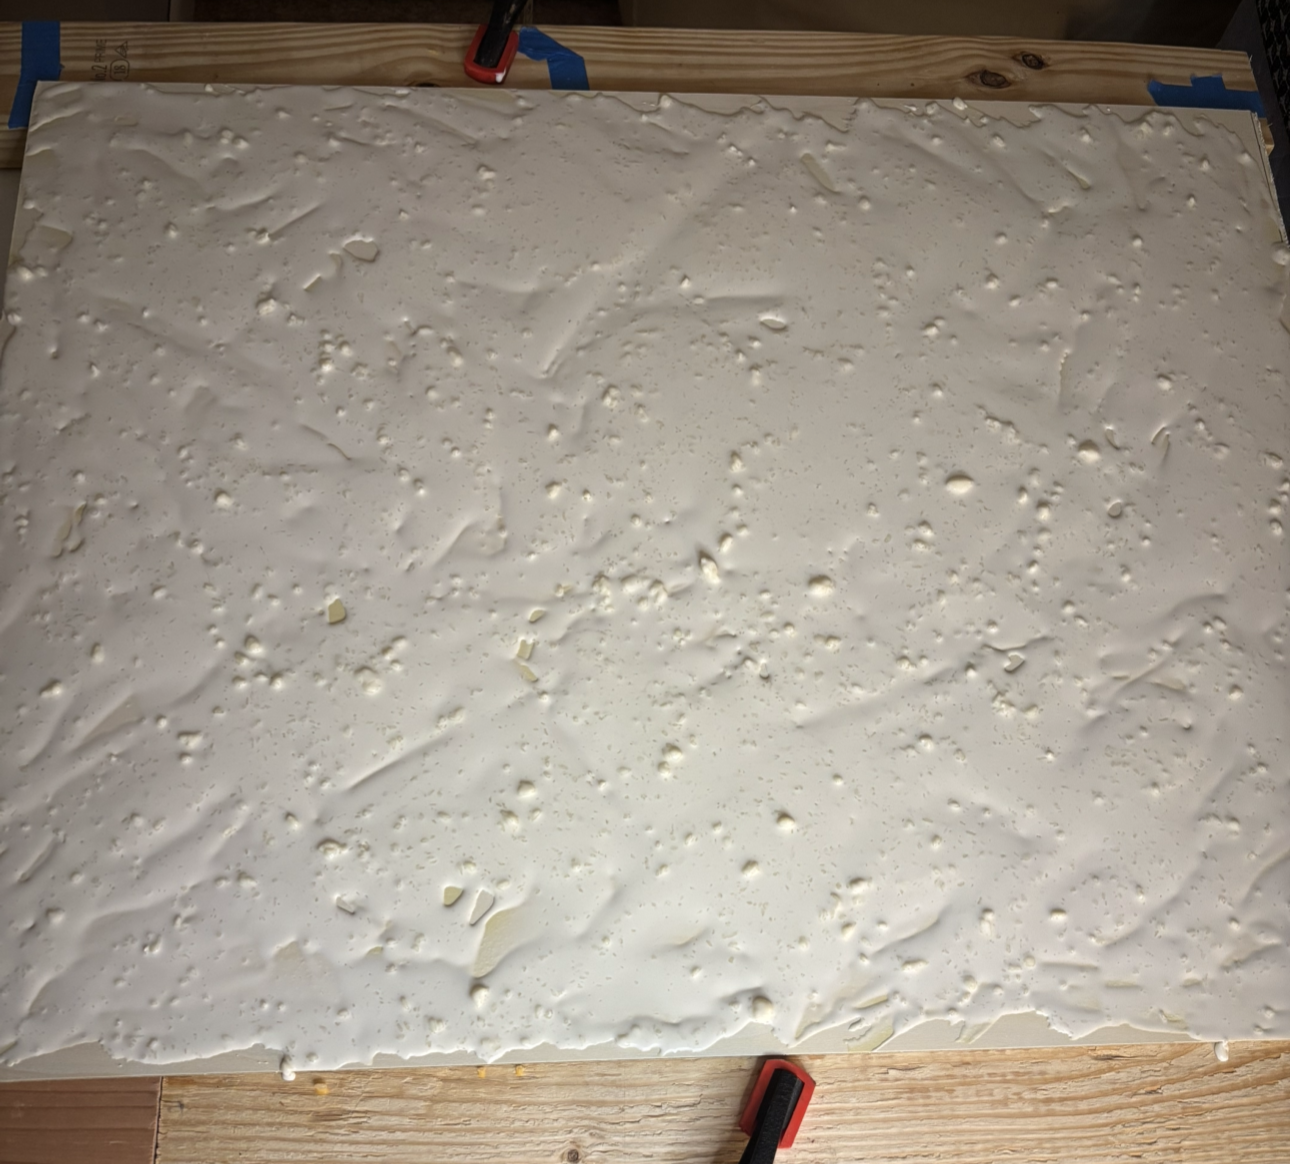
I then sandwiched the cheese with another slice of bread and began… wait that’s not right. I then sandwiched the glue with another piece of poplar and stacked a little over three-hundred pounds on top to get the boards to fully flex. I also added some clamps to keep anything from slipping. This setup has worked well for me in the past.
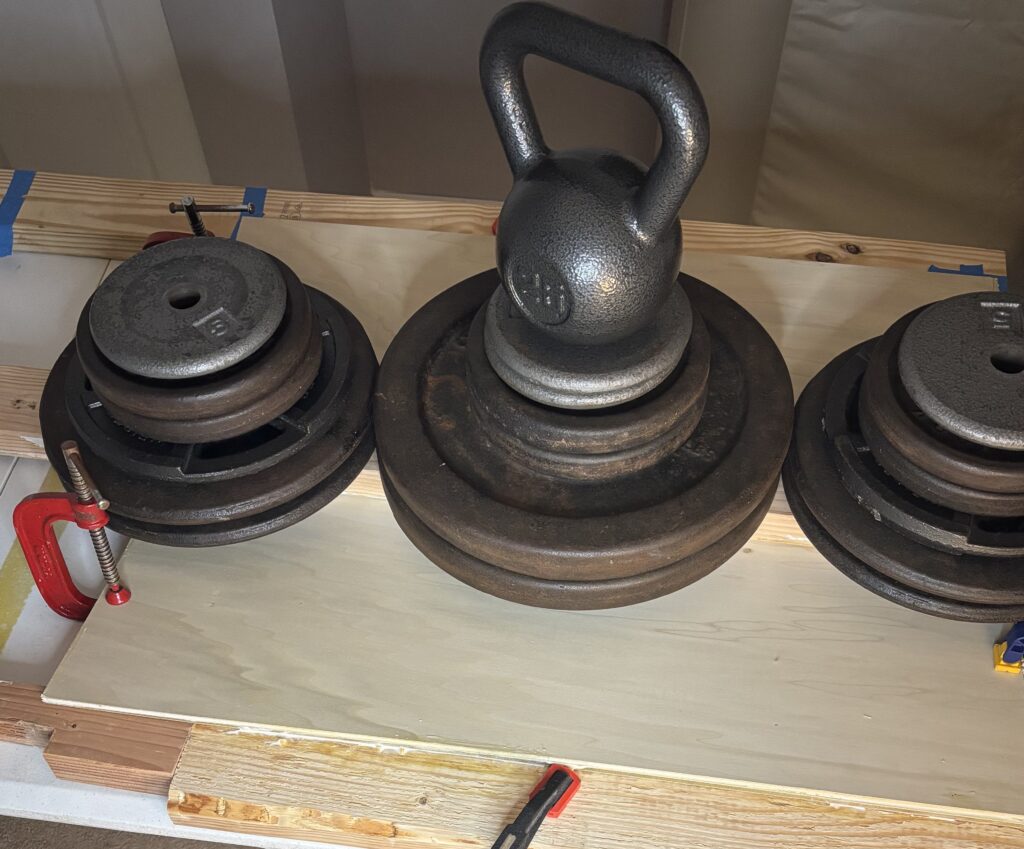
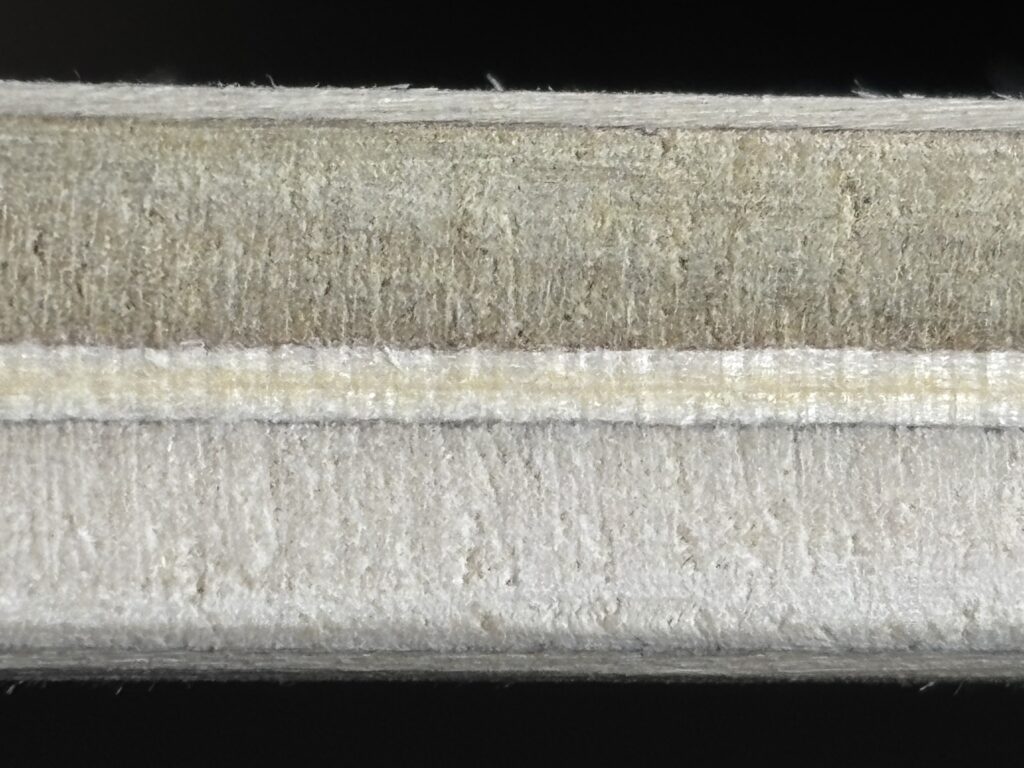
Since I have no idea how long it takes for medieval cheese glue to dry, apparently people from the Middle Ages weren’t considerate enough to write it down for me, I decided to give it a full 48 hours to cure; it also took a similar amount of time for me to work up the courage to take the clamps/weight off. I fully expected the wood to split, the glue to give out, or the boards to not hold their shape, but miraculously, none of these things happened. Instead, the boards were perfectly bowed and ready to be cut.
The medieval cheese glue has left me in awe. I’ve done this exact same process with modern synthetic wood glues, and the cheese glue appears to have worked better. I even messed around with some offcuts from this glue up, and the cheese glue is indeed stronger than the wood itself. Also, as you can see in the picture, the glue joint is seamless. Perhaps the medieval recipe is right, and this glue is waterproof and fireproof after all.
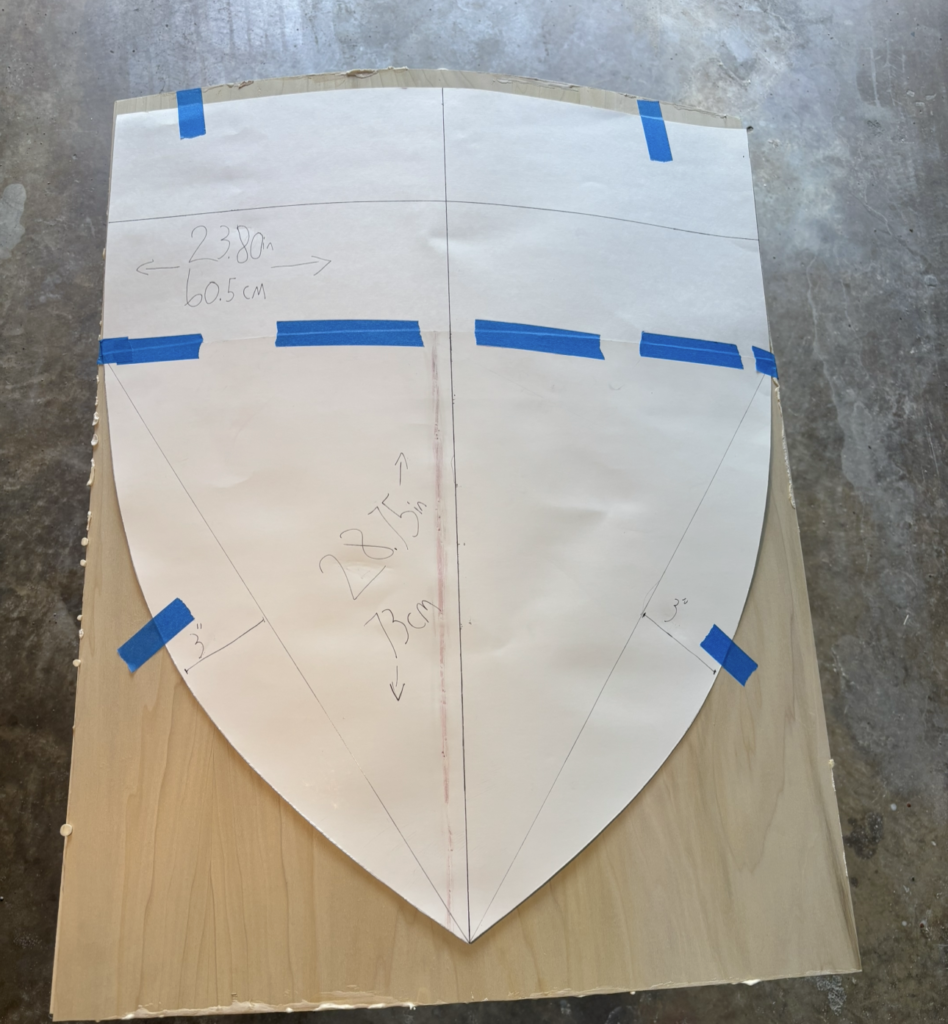
I then made a template that exactly matches the dimensions of the Black Prince shield to trace onto the wood. The shield is 73cm long and 60.5cm wide; I couldn’t find any measurements for the dimensions of the bow/taper towards the bottom or when it started. So, I went with a three-inch bow starting a little less than a third from the top of the shield. These measurements, in my experience, tend to give off that standard iconic heater shield appearance.
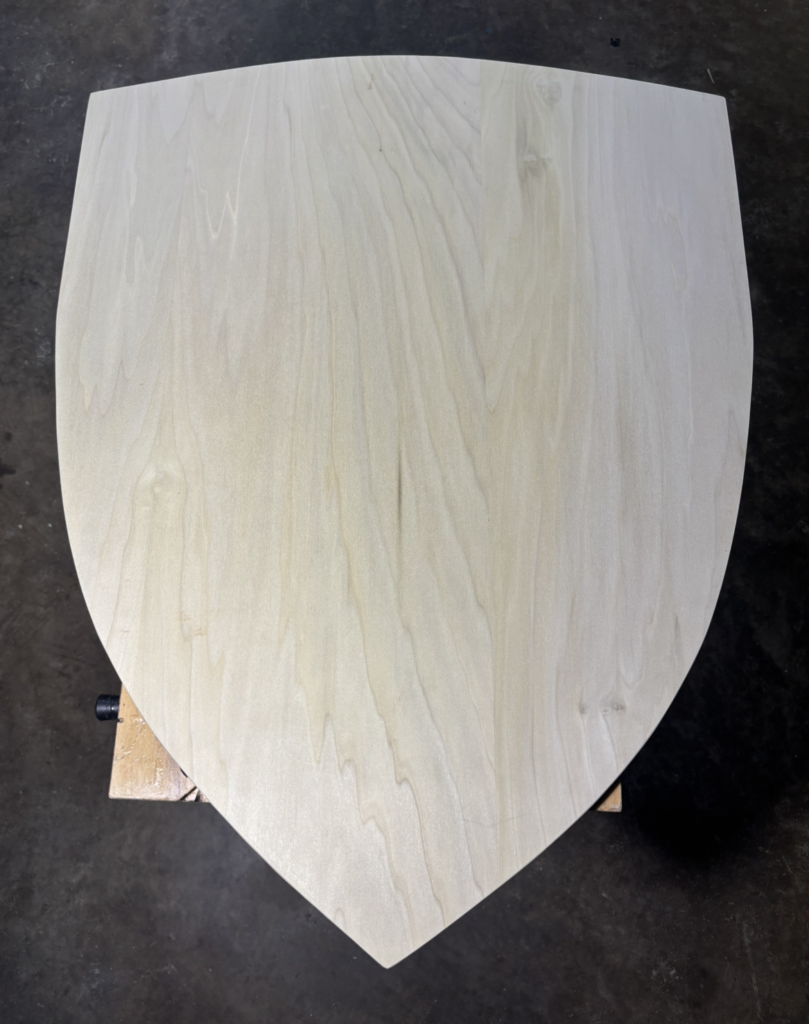
I then grabbed my trusty handsaw and began cutting out the shield. After what felt like countless hours of hand sawing, I was drenched in sweat, and my arm lay limp, but had finally cut out the shield of my dreams. Okay that’s a lie; I used the handsaw for roughly fifteen minutes before giving up and using a jigsaw. This may feel less authentic but all the handsaws I have were invented from the eighteenth century onward, so I was technically cheating to begin with. After sawing, I then spent some time hand sanding the shield till I got a shape I was happy with.
That is all I have for this post; so far, things are going concerningly well. Next week I will be adding excessive layers of linen to the front of the shield and possibly the straps/handles. As of now I am stoked with how this project is going, thanks for reading!
References
Steane, John. The Archaeology of The Medieval English Monarchy. London: Routledge, 1999.
Chamberlin, John M. V, trans. “The Shield of the Black Prince, “Der mittelalterliche Reiterschild. Kohlmorgen, Jan. Karfunkel Verlag. 2002.
Mills, Dorothy and Sir James Mann. Edward The Black Prince: A Short History and The Funeral Achievements. J.A. Jennings LTD: Canterbury. 1975.