Heater shields are the most iconic type of shield in modern culture. When most people picture a shield, it’s most likely a heater shield. Being the most prominent shield of choice for knights from the start of the twelfth century through the fourteenth century, they were used for war, jousting, combat tournaments, displaying coat of arms, status symbols, etc. There are many examples of these shields in medieval art, and we have many artifacts, my favorite one being the shield of Edward the Black Prince.
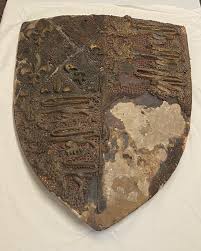
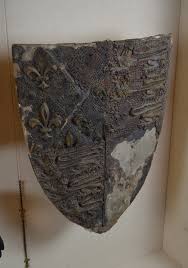
Two images of Edward The Black Prince’s shield from his tomb located in Canterbury Cathedral, in England.
This shield is composed of two pieces of poplar wood, layers of linen, paper, brass pins, boiled leather, gesso, and gold leaf. I will be reconstructing this shield in the most authentic manner that I possibly can in what is hopefully a weekly series of posts which will go into each of the previously listed components extensively. I say (type?) “hopefully” because there is an impending, maybe even inescapable, chance that things will go horrifically wrong, and I will either be making extra or fewer posts. While I have made some shields in the past (including Viking and heater shields) I used mostly modern methods and materials.
The first component of the Black Prince shield that I will be discussing is something I haven’t mentioned yet. That’s because I haven’t seen any archaeology reports or any contemporary sources on heater shields that allude to it–glue. The shield is made up of several layers of various materials, and I certainly need a way of sticking them together, so good glue is a necessity. I might even say it’s the most crucial component.
Luckily for me, the medieval world was full of glue ranging from egg whites to plasters, but there are only two real options that could have been used in making shields. The first would be collagen glue which is made from rawhide and the other was casein glue which is made from cheese (seriously, just normal cheese). These were far and away the strongest glues in medieval times and were both used in woodworking. There are some modern variants of both collagen and casein glue still sold but these are certainly different than the medieval recipes. I will be making both of these glues and using them throughout practically every part of the project. Also, perhaps the best part of these medieval glues is that they are both technically edible and yes, I will be tasting them.
Also, perhaps the best part of these medieval glues is that they are both technically edible and yes, I will be tasting them.
First, I will be making the rawhide glue because it should be much simpler and can be stored indefinitely. I’ve heard tell that this glue can be extremely strong; however it does have some glaring issues that make it not ideal for making shields, one of these being, it is very brittle and retains little flex when fully dried. This means when absorbing shock, it has a chance of fracturing. Sadly, since a shield’s whole purpose is to absorb force, so your soft fleshy body doesn’t have to, I imagine most shields weren’t put together using this glue. Hide glue also loses its strength when it gets wet. Since I would prefer my shield not to fall apart in the rain, I will only be using the rawhide glue in non-structural parts of the shield (it’s also a key ingredient in gesso which I will need later in the project). The process of making the rawhide glue is quite simple, I will be following this medieval recipe from the twelfth century.
Glue from Hide and Stag Horns When this has been carefully dried out, take some cuttings of the same hide [horse, ass, or cow-hide], similarly dried, and cut them up into pieces. Then take stag horns and break them into small pieces with a smith’s hammer on an anvil. Put these together in a new pot until it is half full and fill it up with water. Cook it on the fire without letting it boil until a third of the water has evaporated. Then test it like this. Wet your fingers in the water and if they stick together when they are cold, the glue is good; if not, go on cooking it until your fingers do stick together. Then pour this glue into a clean vessel, fill the pot again with water, and cook as before. Do this four times.
On Diver Arts by Theophilus
This is my rawhide I will be using which I got from 100% cowhide dog bones. I soaked the bones in water overnight to make them soft and workable. I then spent more time than I would like to admit cutting the cowhide into little squares. With my hands cramping and my scissors crying for mercy (I actually demolished these scissors). I tossed some of the hide in a pot and followed Theophilus’ instructions. It took several hours for the water to become sticky and roughly half the water had evaporated away.
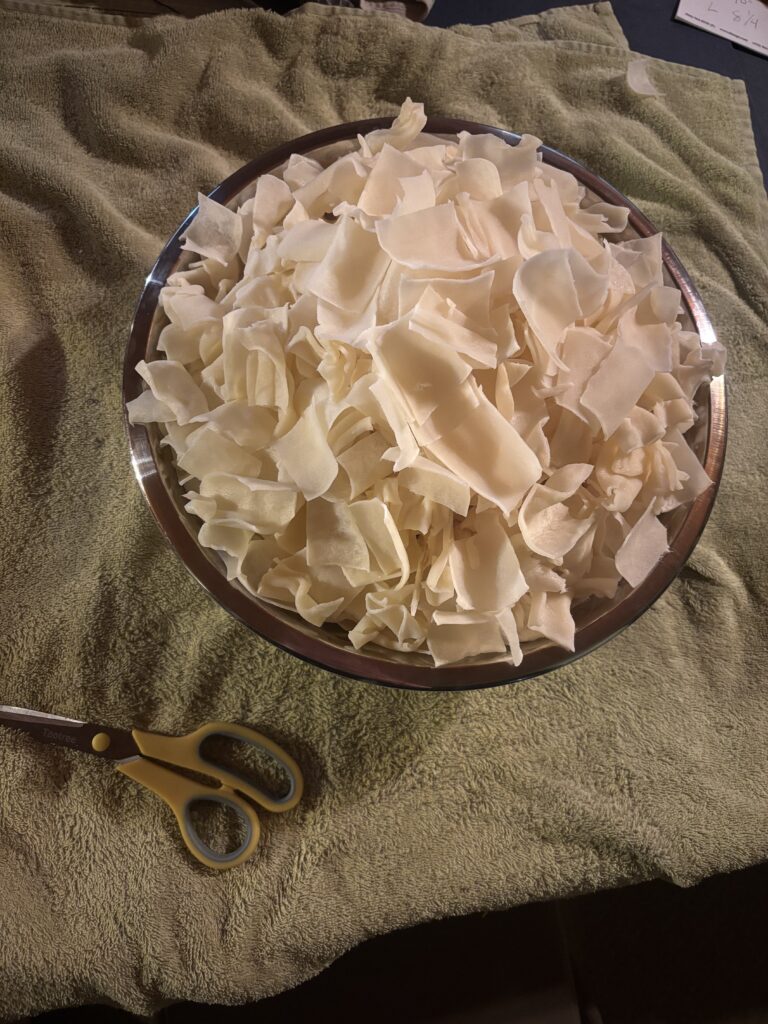
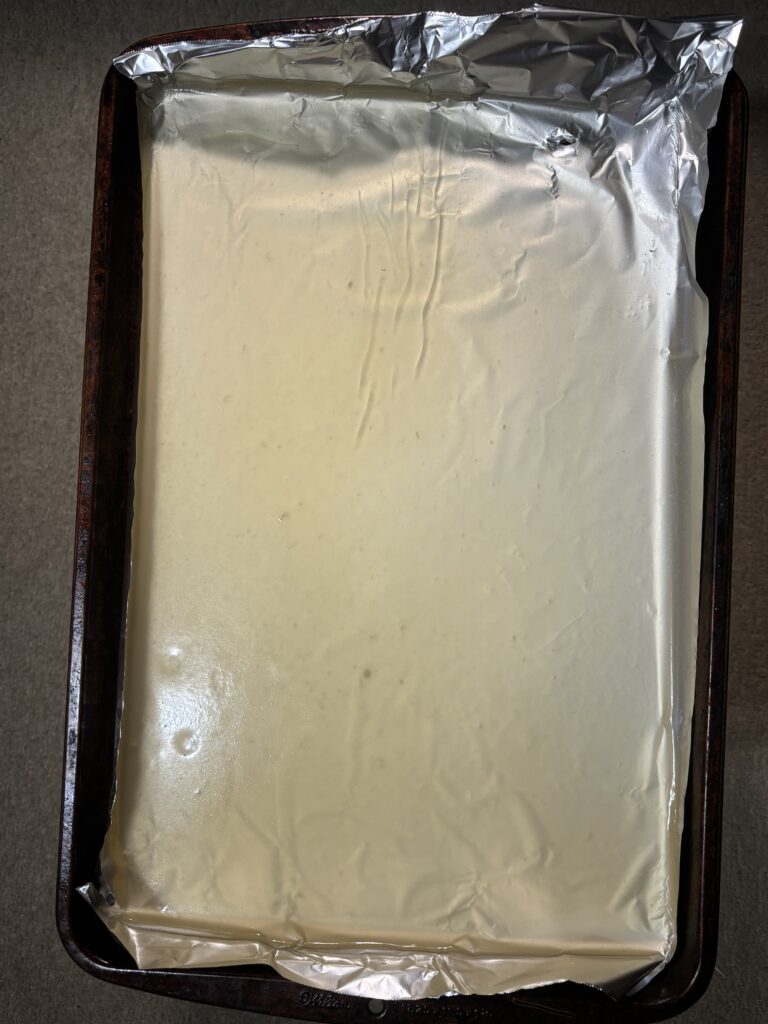
I then strained out the rawhide and poured it into a pan to harden. I’ve also only done one cycle so far even though Theophilus suggests four. To use the glue, you simply take some snippets from the pan, add some water, and heat it up. Also, in case you are unaware, this collagen glue is almost identical to unflavored Jello (sorry if this ruins Jello). So obviously the taste wasn’t bad; it was essentially a thick unflavored Jello.
Now onto the cheese glue, which will be the glue I use for most of the project. This glue was actually much more common/popular for woodworking in the Middle Ages and was common all the way up to modern synthetic glue. Just like synthetic glues, if casein glue is made properly, it can make wood joints stronger than the wood itself. There are numerous recipes written in medieval Europe including one from Theophilus. However, I’ve elected to follow the recipe from book one of the Sectrum Philosophorum. I chose this one mostly because it originates in fourteenth-century England, which is when and where the Black Prince shield also originates. The recipe is as follows.
Take old cheese, and cut it into little pieces, then put them in water for two full days or more. Then grind them well on a marble stone. Then add to them almost as much good quicklime, and grind them well together, and it is the best glue; use it immediately while it is moist. This glue joins wood very well and when it is dry it is dissolved by neither fire nor water.
Sectrum Philosophorum Book 1
This recipe should be extremely easy for me to follow because it isn’t vague at all and uses precise measurements like “little pieces” and “almost as much.” It also doesn’t mention if type of cheese matters or what consistency/texture the finished glue should be. I see no way this could go wrong and by the end, I’ll have glue that is fireproof! Most of the cheese made in foureenth-century England would have likely been ewe cheese; however I made my glue from mozzarella. This probably isn’t the most historically accurate cheese for me to use but I have good reasons for it. It is very cheap, I could buy it already fat free (fatty cheese weakens the glue), and modern sources claim mozzarella is effective.
I started by cutting up the cheese and soaking it in water for a couple days, I also changed out the water a couple times because some other medieval recipes mention this. After waiting a few days and the cheese had mustered up a sour smell, I ground the cheese the best I could. While the recipe says to use marble, I used a stone cutting board and some glass to grind the mozzarella. The idea here is to use hard non-porous surfaces to smush the cheese into a fine powdery paste.

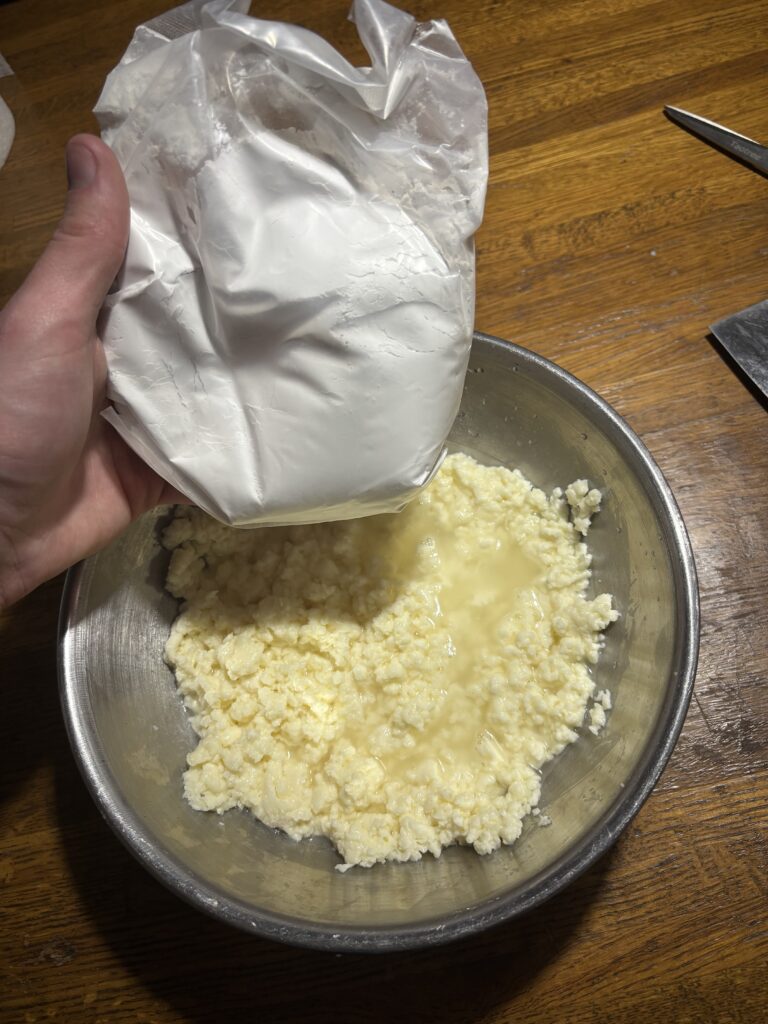
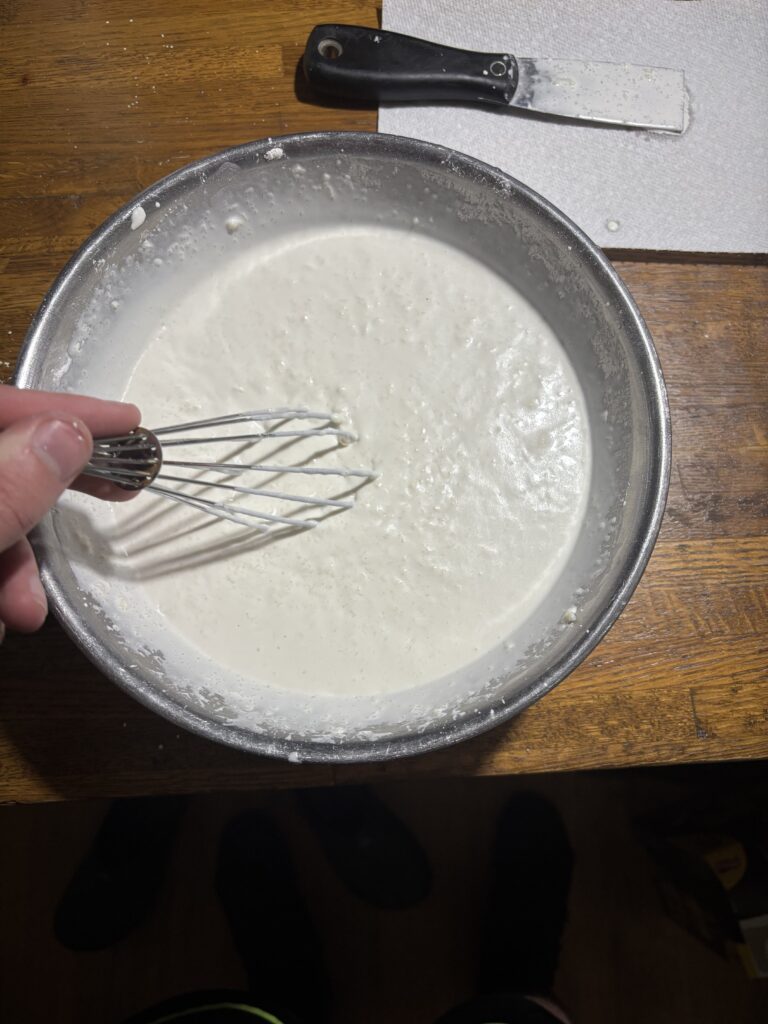
Next, I very precisely measured out “almost as much” quicklime (calcium hydroxide) to add to the paste. I mixed the quicklime with the ground mozzarella and stirred continuously while adding water till I got a consistency I was happy with. I ended up at a viscosity similar to Elmers glue.
My delectable cheesy glue unfortunately was somewhat grainy, some may even say lumpy, and I’m guessing this glue is supposed to be smoother. I will certainly be making more of this glue in the near future and I will now be striving for a velvety smooth glue. Also, not surprisingly, the combination of soured cheese and quicklime did not mingle well on my palate.
That’s all I have for this week, if you want to see how the glue performs stick around (yes that was intentional) for next week’s post. I will be tackling the wooden construction of the shield, and the cheese glue will be a crucial part of whether I succeed. I will also be talking more about heater shields in general, which will hopefully be a more common subject moving forward. Thanks for reading.