We’re back!
Last week, we started the tablet woven belt and channeled our rage into something productive. Who needs anger management when you have medieval textile crafts?
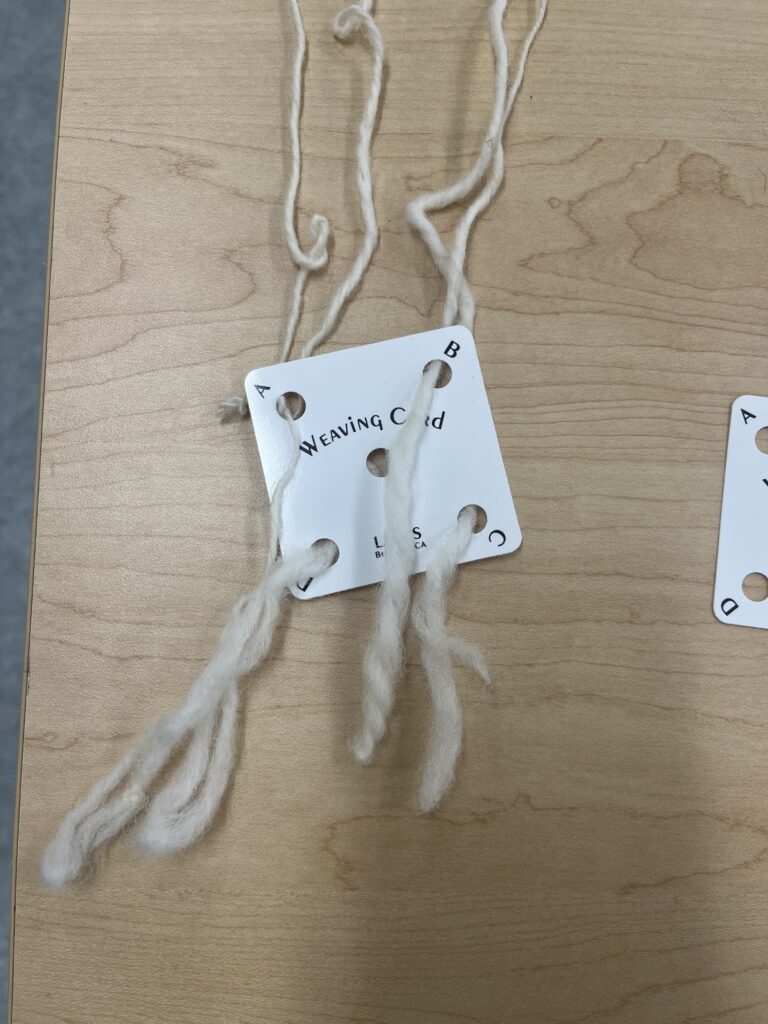
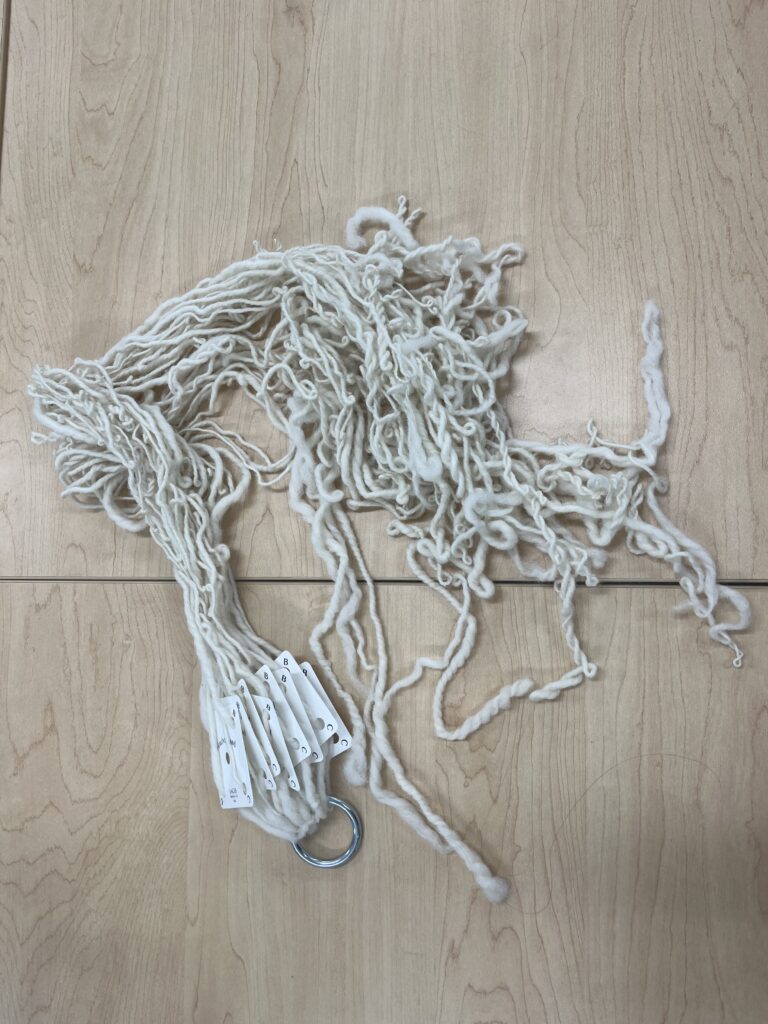
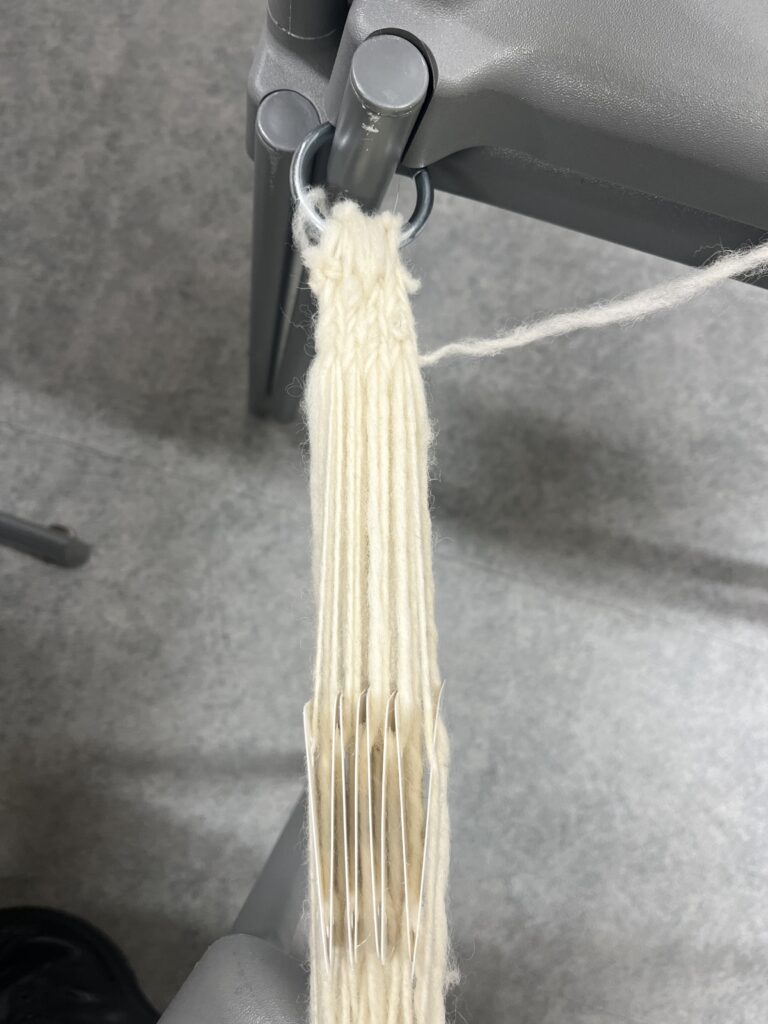
Various stages of setup, from last week. From left to right: Threaded cards, cards tied to anchor ring/buckle ring, actively weaving.
I said I’d be back after a few hours, and it took a few hours. A few like… 20 or so, I’d say. This thing alone took up 30 hours of my week last week, and I got it finished on Friday!
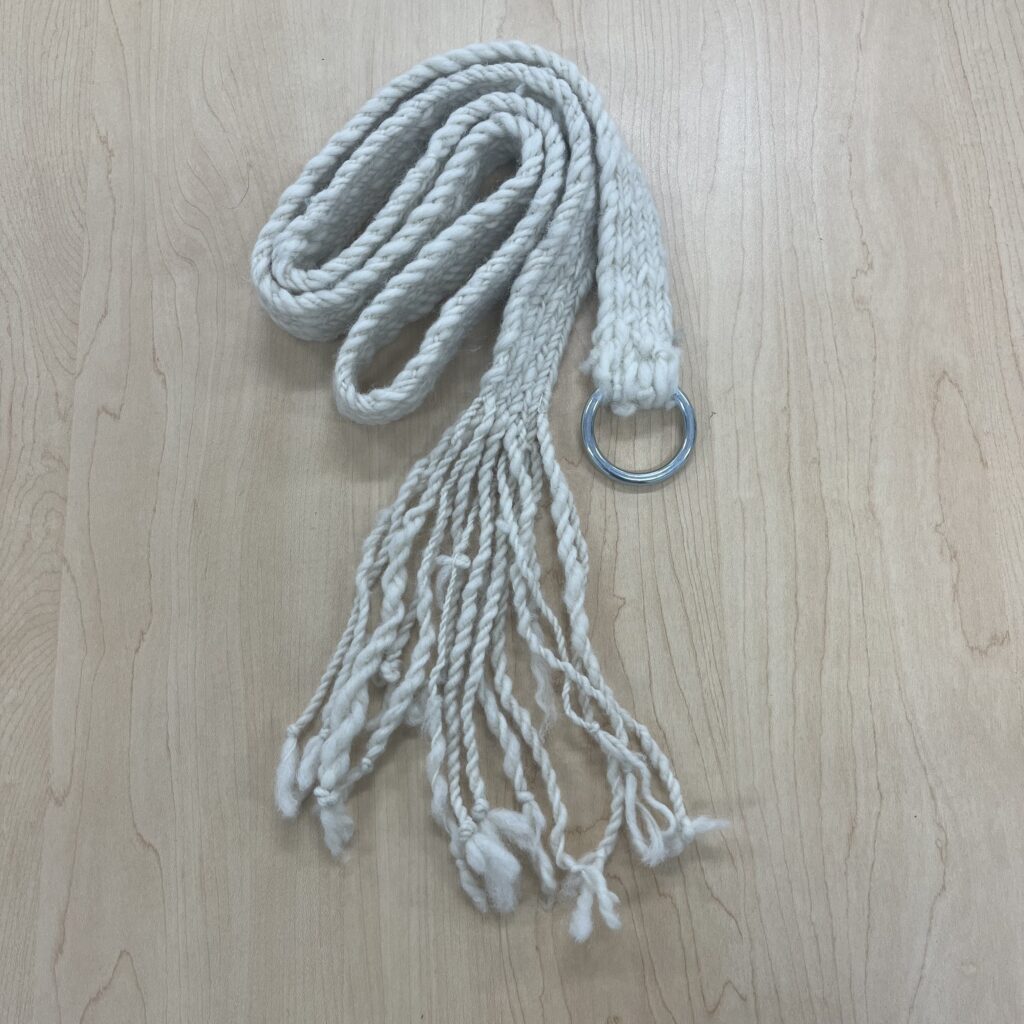
The finished belt! I would say it’s about 4 ½’- 5’ long, just counting the woven part and not the tassels.
The type of things you do to finish one of these belts aren’t really conducive to picture-taking, but I can explain it to you!
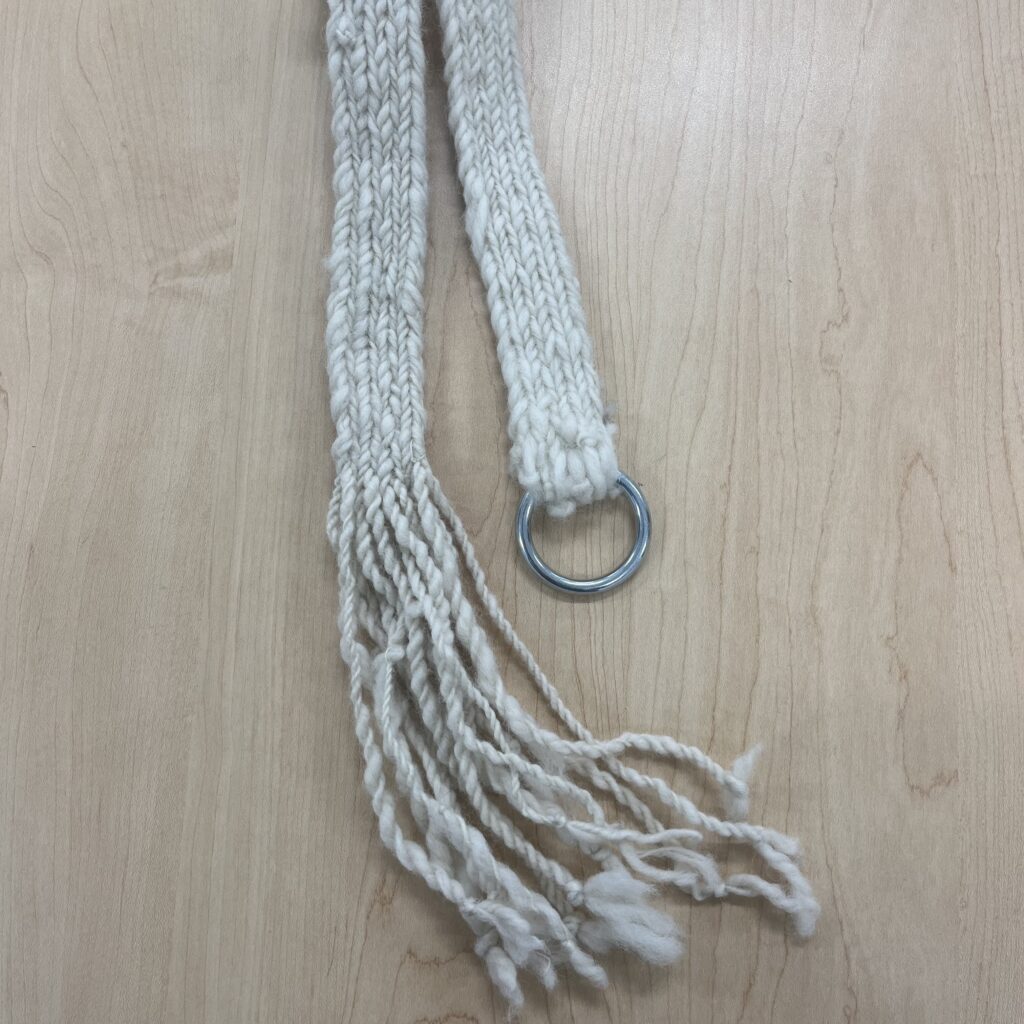
A close up shot of the start and end. This will come in handy in a minute.
The method I chose for finishing was to spin and ply the ends of the belt into tassels. This is… pretty much the same as when I spoke of it last, just more annoying because everything has to sit right and tension needs to be maintained or the whole thing will unravel on you. Once I finished, I laid my belt and weaving tablets out flat on a table, and weighted the section at the very bottom just before the unwoven, tablet-strung threads with something heavy. At the time, the “something heavy” was 3 weight-accurate plastic training swords stacked on top of each other. This is really niche and strange, and while I’d love to tell you why that was the most suitable thing available to me at the time, that explanation consists almost entirely of spoilers. What I do have for you in the absence of an explanation or a photo of my unique setup is a picture of these things in action.
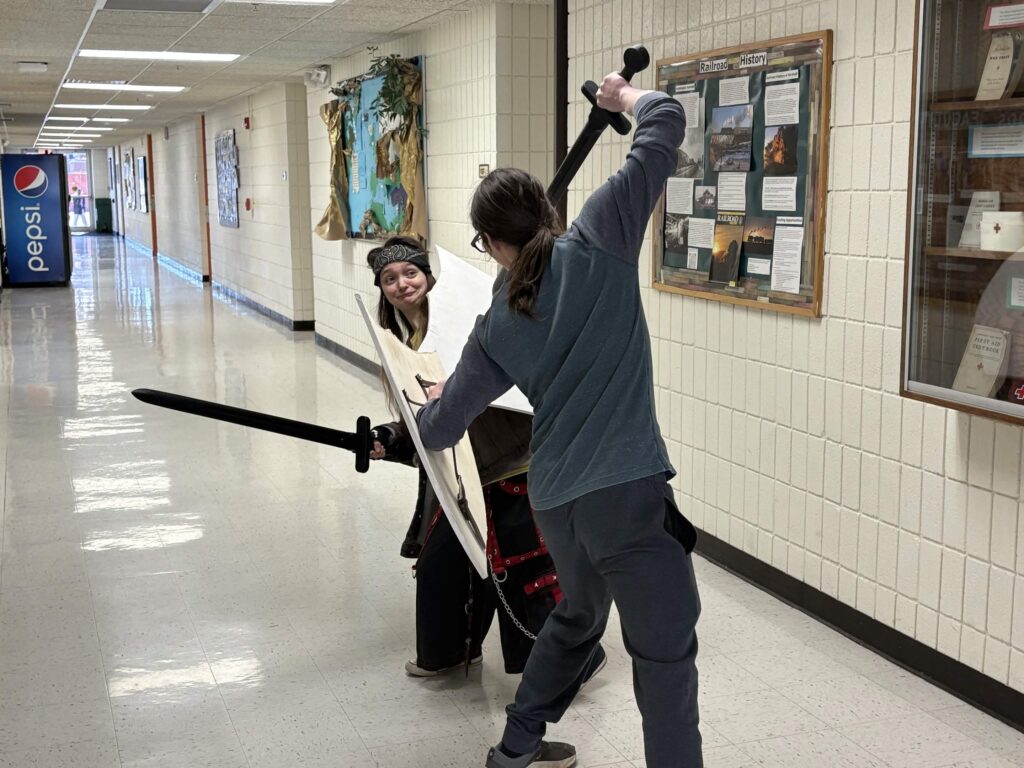
The training swords needed some preliminary testing. I don’t want to talk about it. Noah (pictured right, going full send) is trained in fencing. I (pictured left, thought we were screwing around) am not. The picture displays this fact. My wrist felt like jello for 2 days. Thanks for the picture, Kris. I hope you had a good time spectating.
Anyway, all sparring aside, once the belt was weighted down I could start spinning. What? I’ve already spun a ton? Yes, I have. The tension on the ends of these threads however is awful after so much weaving and after being cut down to size, though, so for good measure I spin each loose end taut in the direction it was originally spun.
Here’s a picture of the pattern of the weave from the side. Pretty cool, right? Keep paying attention and I’ll give you another picture.
Now to ply. From here, I just tightly spin both threads around one another in the opposite direction of their spinning.This is actually pretty easy, because they’re already kinda grabby with each other. This is a good thing when you’re plying. After they’re plied, I tie the whole deal in a knot at the end and go on to the next one.
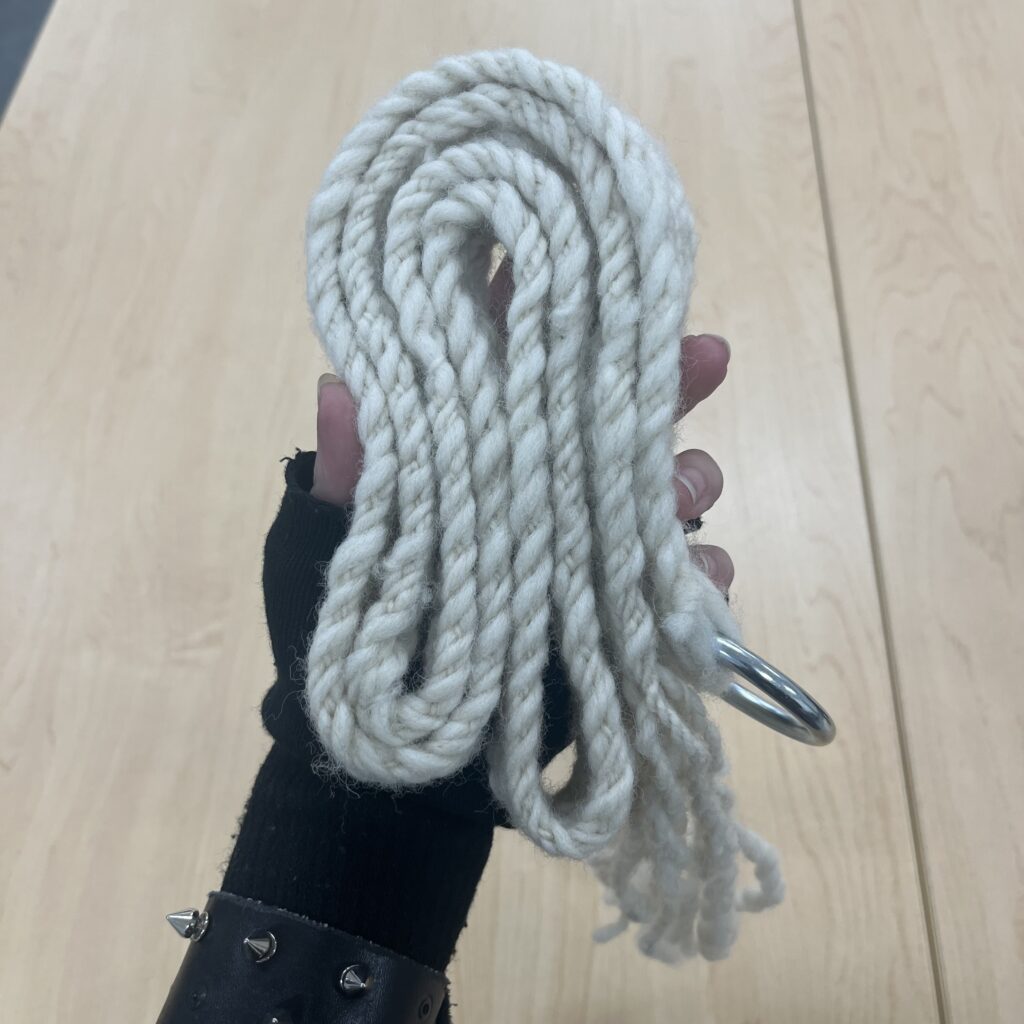
After… a few hours (you better be patient if you want in on this stuff) I had all of them done. I did the front (A and C) and back (B and D) sheds together, so this keeps the thing from unraveling. A nice relaxing 30 minute dip in a hot jacuzzi full of Dawn (sponsor me!) and then a rinse makes sure that the tassels stay the way they are. Never change, tassels. Please. So I don’t have to ply you again. You might see in the above photos that some of the ends of the tassels are fuzzy, and that’s because I need to spin them up (again) and give them another dip sometime soon. For now, that can wait.
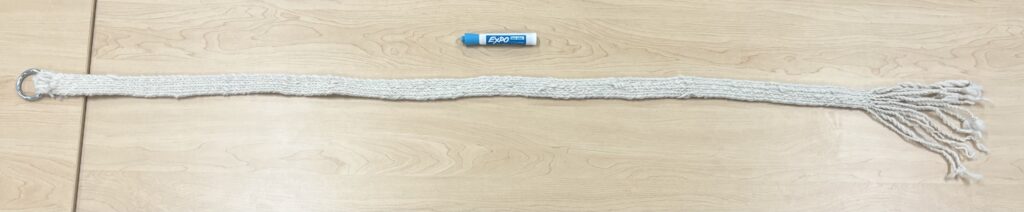
So we’ve finished the belt! Expo marker for scale because I don’t have a banana. It’s… completely finished too, right?
Nope! The ring needs a pin.
Why? Well, by the 14th century, most people had some kind of belt buckle. Sure, somebody might choose to wear one for whatever reason the same way that people still peg their jeans and use so much sun-in that they go a little orange on the head (I support you!) but for the most part people had belt buckles. This included belt buckles that were shaped like rings, though!
Behold! A belt buckle! Link to source here. Special thanks to the Portable Antiquities Scheme website.
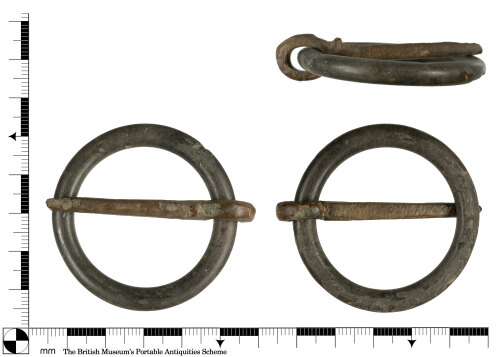
The link and image above is just one of many near identical belt buckles that date from the 13th to the 15th centuries in England, the one above specifically being from 13th-15th century Wessex. If it ain’t broke they didn’t fix it, I guess, and I don’t blame them- brooches and pins in this style are old, as old as the Viking Age’s penannular brooches and older. That’s because the belt buckle is literally just a closed penannular brooch. If you go to the linked site and scroll down there are others so similar you’d think at first glance they were the same one, and if you keep nosing you find a bazillion of them in various materials and levels of decoration. We can agree that the design was both popular and period-accurate alongside being pretty accessible, so I’m gonna make a pin for my belt buckle, and smash the crap out of my fingers while I’m at it. Let’s go!
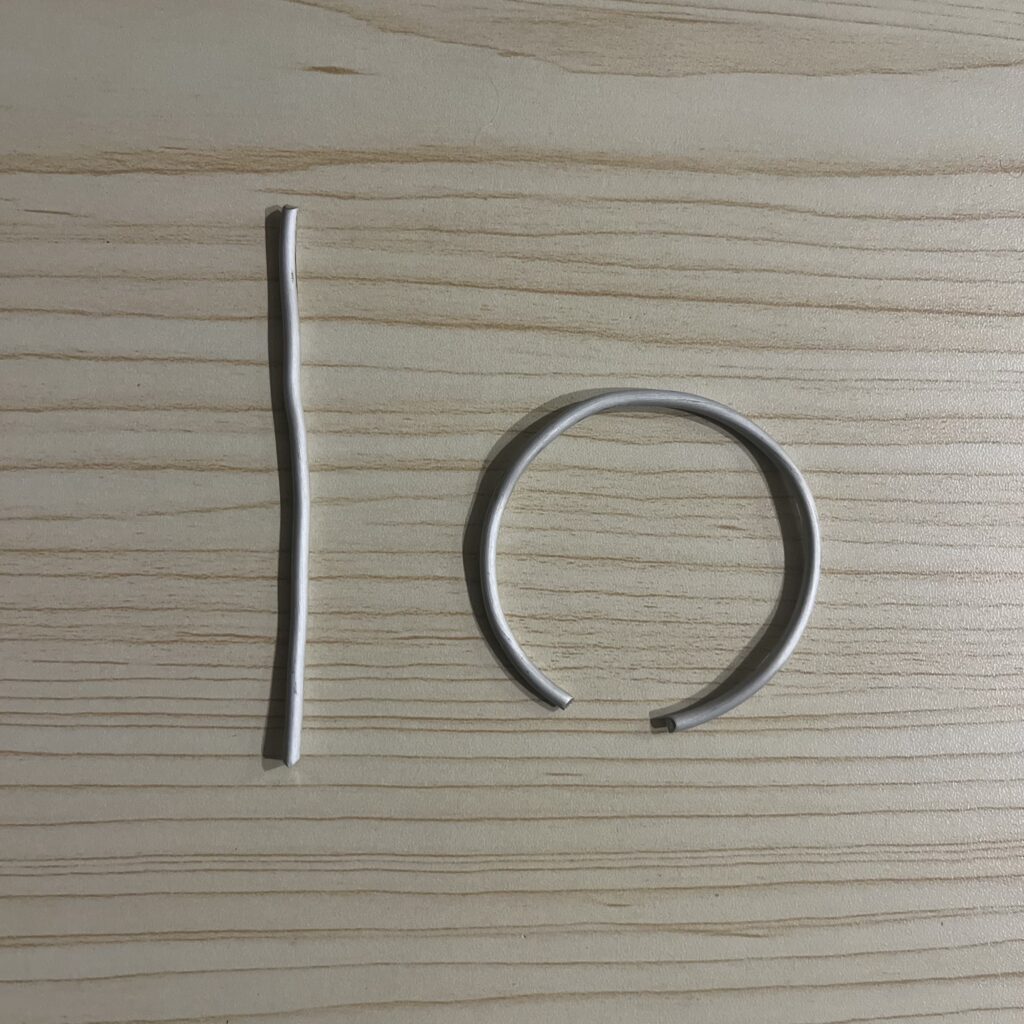
The raw wire.
First, I’m just going to use some wire from the hardware store for this. It’s not technically a textile, and I’m not a blacksmith, so I’m not going to be focusing on period accurate materials or methods here. This is mostly for form and function- it looks similar to the period belt buckle, and it helps us visualize the textile as it would have been. Also,I can wear it this way. For the pin, I just use a straight piece of wire. The reason there’s a ring here is because I made a penannular brooch as well because I’m a sucker for a good cloak pin. You’ll see that put together too, I guess. Also, full disclosure, it’s partly because I forgot to take pictures of the process for the belt pin.
Smushed! One of my fingers looked like this too by the time I was done.
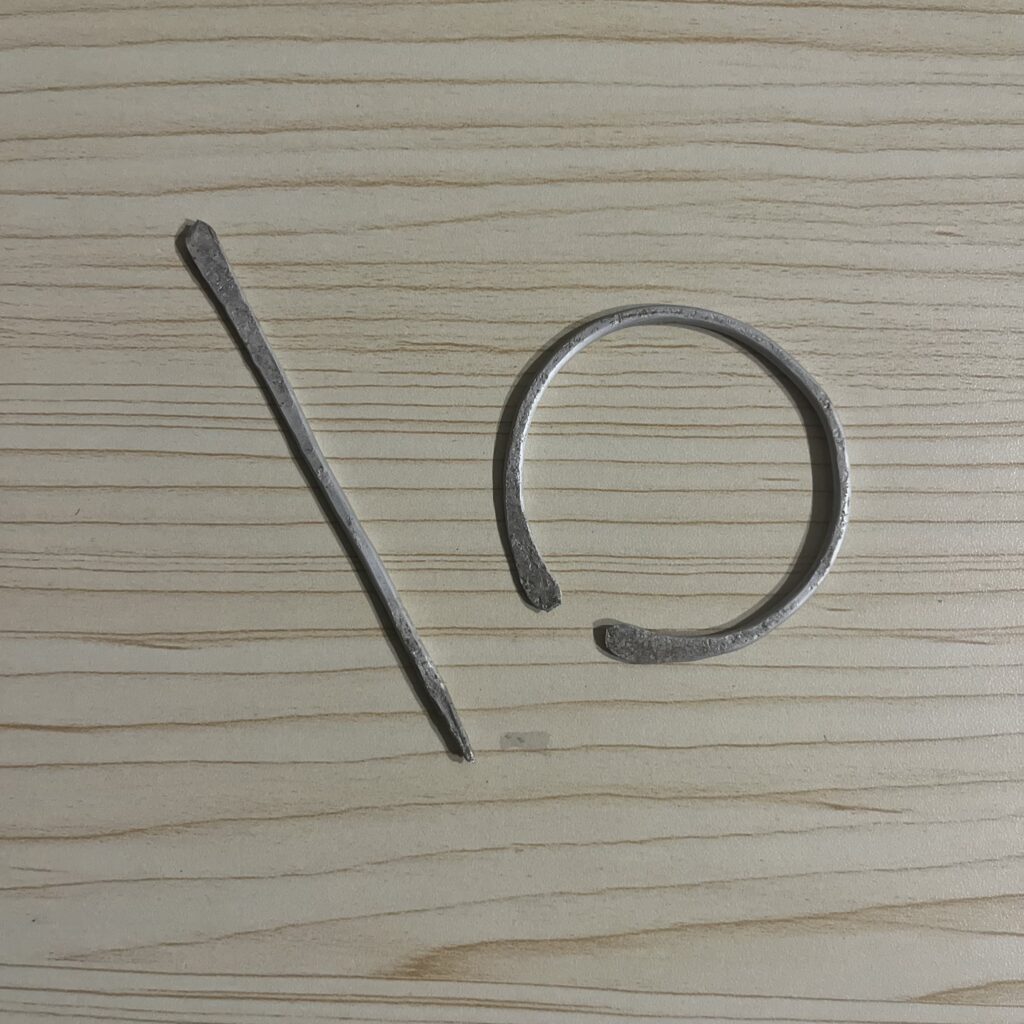
From here, I just take a hammer and shape it. The metal is soft enough to bend and flatten under the strike of a regular hammer, without any kind of heating. That said, though, it’s sturdy enough for our usage.
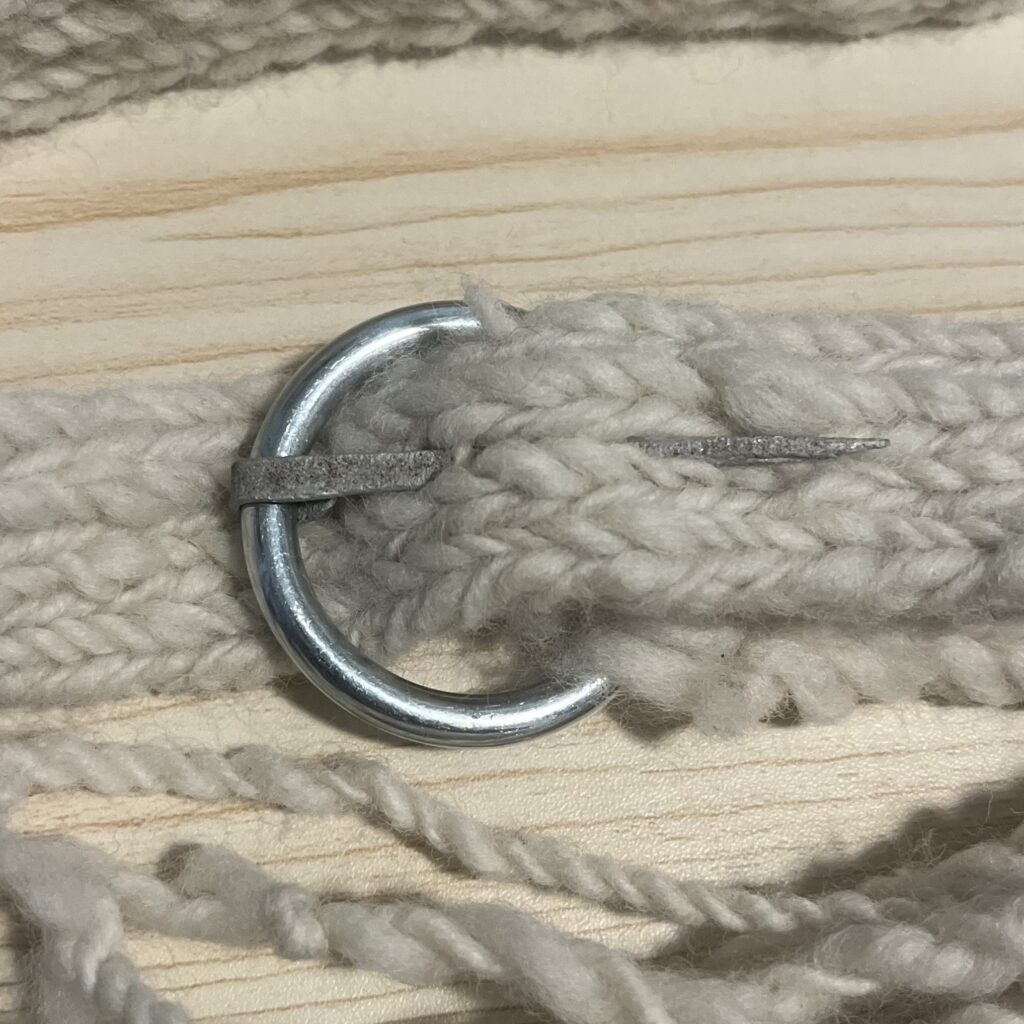
Once your pin is shaped… into a pin-like shape, and the butt end flattened out, all you have to do is curl it up around your ring with some wiggle room. The wiggle room is for the sake of function- it has to be able to rotate and slide along the loop.

The curled bit and the pin on the ring. Also, finished brooch. I think it turned out!
For some reason, this stuff came out looking like I just dug it up. I think it adds to it, though, in a way! With that, the belt is finished!
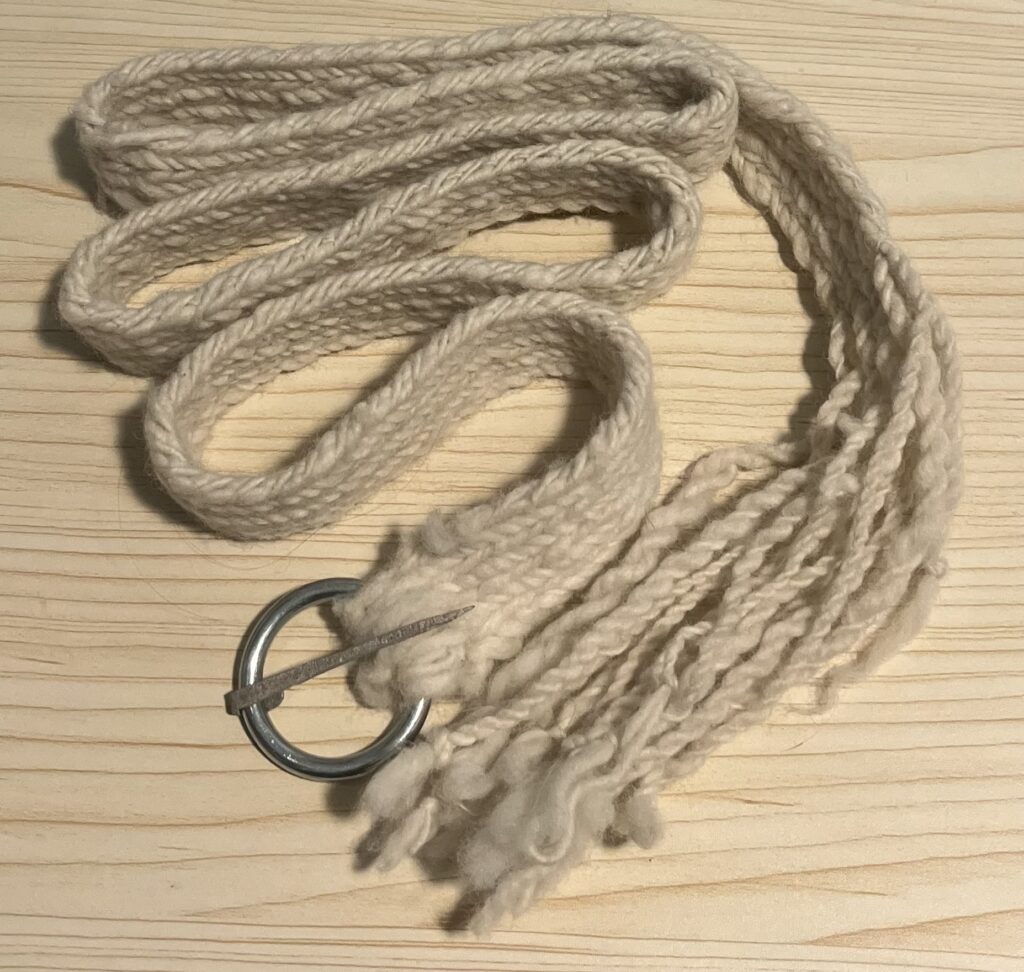
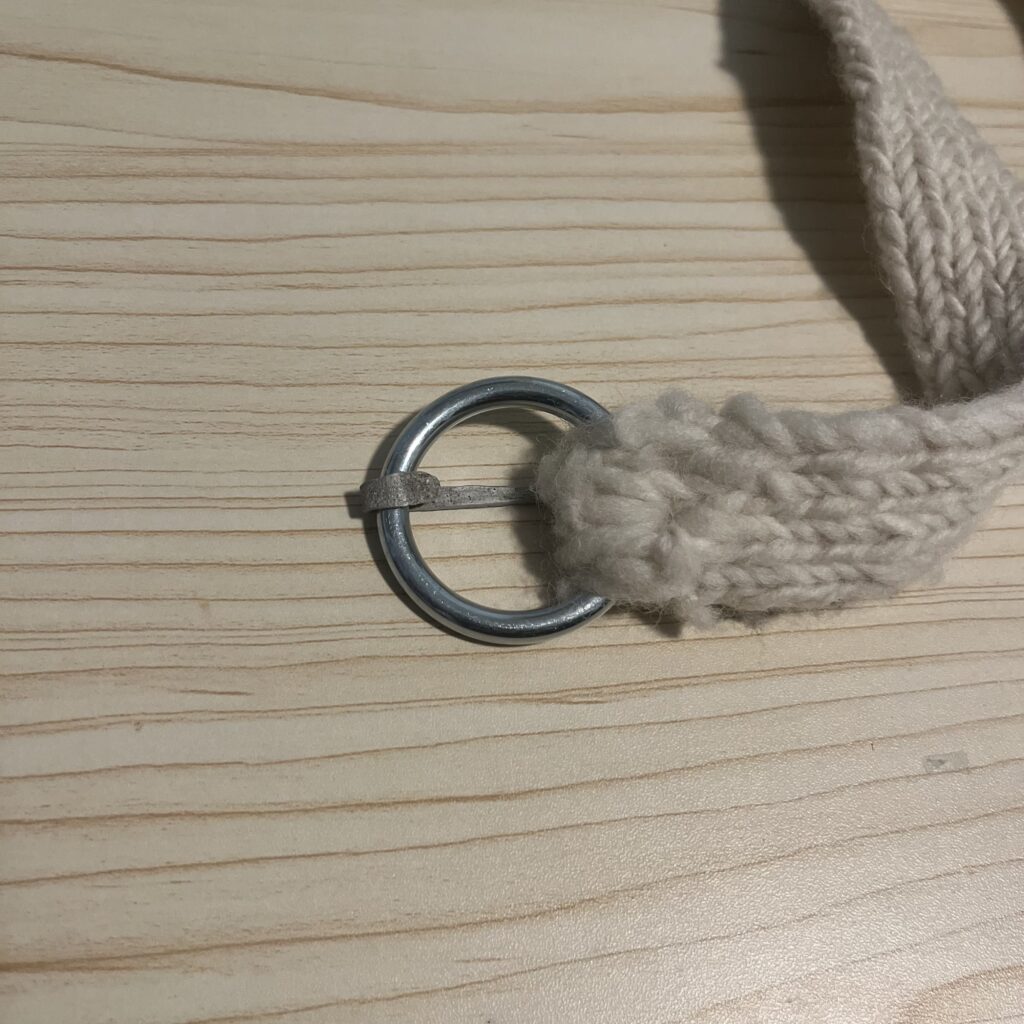
The finished belt all together! This one REALLY turned out, I think!
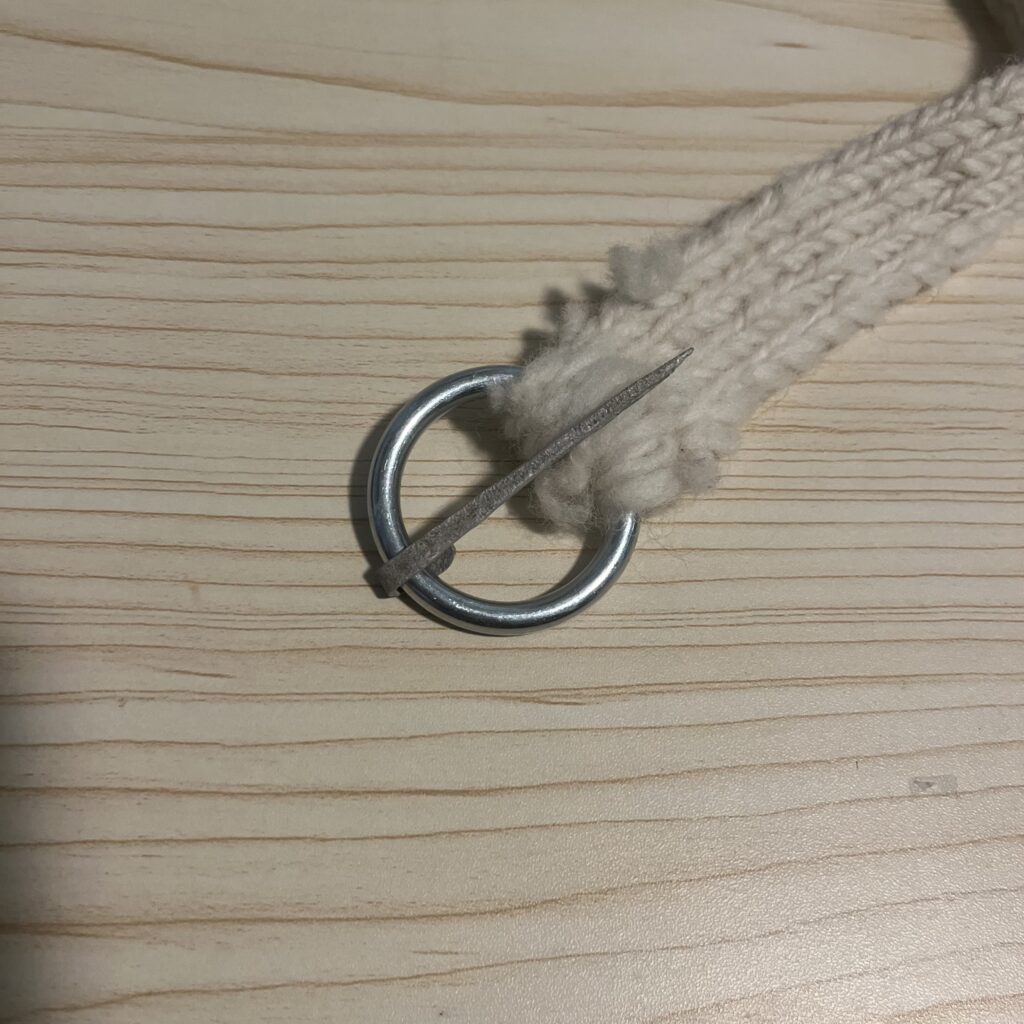
The belt buckle doing its job. Rather than piercing the threads, the pin slides through the open weave.
That’s all for now. We’ll probably do some more patterning next. Thanks for reading!
You didn’t think I was going to let you go without one of these, did you?